C64 OS on BMC64 with Networking!
C64 OS is an operating system made for real Commodore 64 hardware. But it does support C64 emulators such as VICE. The emulator needs to have support for a virtual CMD HD or IDE64, which BMC64 does. For C64 OS networking the emulator has to support networking and modem emulation, which BMC64 supported neither... until now!!! 😃
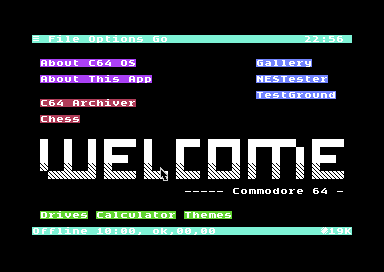
In my last post I successfully got BMC64 running with the help of Patch 1, but now I wanted to get full networking support running. I spent time updating BMC64 to the latest Circle Step 51, which had the potential to unlock networking support. I released multiple patches with additional features, but with the release of Patch 7, BMC64 now provides the modem emulation and network connection needed by C64 OS and its network enabled applications. 😁
UPDATE: BMC v5.0.0 official has been released with networking support!!! 🥳
The choice
When you order C64 OS it comes with two images pre-installed with C64 OS, which support either the IDE64 or the CMD-HD.
Both work great, but the IDE64 version runs faster on BMC64.
The choice is yours...
Prerequisites
Required:
- Raspberry Pi 3B+ - BMC64 requires a PiZero, PiZero2W, Pi2 or Pi3.
- Note: Pi4 or Pi5 is not supported
- Network connection. (Ethernet or Wi-Fi) - BMC64 only supports Raspberry Pi's onboard network hardware.
- A copy of C64 OS: Order it here
- Latest BMC64 version - v5.0.0 or greater.
- JiffyDOS kernel (suggested store)
- CMD HD 2.80 boot rom (suggested store) for the CMD-HD choice
- USB Mouse
- microSD Card for BMC64 installation
How to install C64 OS on BMC64
MicroSD card setup
- Download the latest BMC64 release, extract it's contents onto the microSD card.
- Full installation guide
- Copy the JiffyDOS and CMD HD 2.80 boot roms onto the microSD card (suggested folder
/C64)- Note: if you rename the CMD HD rom to
dosCMDHDBMC64 will automatically find it.
- Note: if you rename the CMD HD rom to
- Copy the
c64os v1.0x.dhdCMD HD file containing C64 OS from your C64 OS System Card to the microSD card.- Note: Putting the
dhdfile onto the optional USB stick instead of the microSD card may give better performance.
- Note: Putting the
Configure BMC64
- Plug in the USB mouse
- Boot up BMC64
- Configure port 1 as a USB mouse
- Joyports -> Port 1 -> USB Mouse (1351)
- Set the Kernal ROM as JiffyDOS
- Machine -> ROMS... -> Load Kernal ROM... (Find and select)
Follow the CMD-HD or IDE64 configuration based on your choice
CMD-HD configuration
- Set the CMD HD boot rom
- Drives -> Change ROM... -> CMDHD... (Find and select)
- Configure Drive 10 as a virtual CMD HD
- Drives -> Drive 10 -> Change Model... (CMDHD)
For full details refer to the official C64 OS setup guide:
Set up VICE with pre-configured CMD HD hard drive image
IDE64 configuration
- Set up IDE64 cartridge
- Goto this site: IDEDOS 0.90 download system v1.3
- Select the options below and download
- Target system: C64 or C128
- Cartridge version: v4.1
- Disk drive speeder system: JiffyDOS
- PCLink: USB with $DE5D for USB Base Address
- Misc Options, only change:
- Use optimized UPCLink transfers: ON
- Download in ".crt" format for use in Vice: ON
- Inside the zip, you will find the idedos***.crt file you need
- Extract the idedos***.crt into the /carts/c64 folder on the microSD card
- Attach the IDE64 image
- Cartridge -> IDE64 -> ATA Device 1 -> Attach Image... (Find and select .hdd file)
For full details refer to the official C64 OS setup guide:
Set up VICE with pre-configured IDE64 hard drive image
Optional configuration
If you want to be able to access a folder on the microSD card directly from C64 OS to make it easy to transfer files into C64 OS, you need to set up the IEC FileSystem on one of the drives.
- Make a folder on the microSD card (suggested folder
/c64os) - Configure Drive 9 as an IEC FileSystem
- Drives -> Drive 9 -> IEC FileSystem = On
- Drives -> Drive 9 -> Options -> True Drive Emulation = Off
- Drives -> Drive 9 -> Select IEC Dir... (Select folder on microSD card)
If you want to be able to use the Fast App Switching in C64 OS (trust me you do), you need to enable the Ram Expansion (REU)
- Enable Ram Expansion (REU)
- Cartridge -> Ram Expansion -> On
- Cartridge -> Ram Expansion -> 16384k
Configure networking
The Network Device setting can be Off, Ethernet, or WiFi.
BMC64's software modem uses this connection for outbound TCP networking.
- Select the network device you want to use
- Network -> Network Device -> Ethernet or WiFi
- Reboot when/if prompted
- Set modem address
- For IDE64 set:
- Network -> Modem Address -> D700
- For CMD-HD set:
- Network -> Modem Address -> DE00
- For IDE64 set:
- Set the Timezone (will only take effect after a reboot)
- Network -> Timezone -> Set to your timezone
- Save settings and reboot
Note
It is very important to set the correct address for modem, depending on the choice you made, to avoid problems connecting due to address conflicts with the Ram Expansion (REU)
WiFi settings (if selected)
- Set WiFi settings if WiFi was selected
- Configure WiFi access point settings
- Set Network SSID
- Network -> WiFi Settings -> WiFi SSID
- Either press to start a scan or type in the SSID directly
- Network -> WiFi Settings -> WiFi SSID
- Set WiFi Security
- Network -> WiFi Settings -> WiFi Security
- Either None or WPA-PSK (will be auto filled after a scan)
- Network -> WiFi Settings -> WiFi Security
- Check the WiFi Country Code is correct
- Network -> WiFi Settings -> Country Code -> Your country code
- Enter the password
- Network -> Enter Password & Reboot
- Enter the WiFi password
- Select Save & Reboot
- Set Network SSID
- Configure WiFi access point settings
On a successful connection you will see either:
Ethernet connected or WiFi connected
Notes
It can take 5-20 seconds after boot for Wi-Fi to connect.
If your Raspberry Pi does not support either an Ethernet or WiFi connection you will not see the option.
Running C64 OS on the CMD-HD
Each time you start BMC64 you'll have to attach the C64 OS dhd image, and launch C64 OS.
- Drives -> Drive 10 -> Attach Disk... (Find and select .dhd file)
- Switch to device 10 with the command:
@#10 - Load C64 OS with the command:
/C64OS - Launch C64 OS with the command:
RUN
Running C64 OS on the IDE64
Each time you start BMC64 you'll have to attach the idedos***.crt cart unless you have set it as default.
- Cartridge -> Attach cart... (Find and select idedos***.crt file)
- It will take 5-15 seconds to reset into IDEDOS.
- Switch to device 12 with the command:
@#12 - Load C64 OS with the command:
/C64OS - Launch C64 OS with the command:
RUN
Alternative launch
- Enter
MANat the basic prompt to launch the File Manager - Scroll down to the "c64 os" entry and press Enter
First run of C64 OS
On first run you'll have to set up C64 OS. You can follow the instructions on the C64 OS site.
Important Notes!
If you want Fast App Switching to work at the Expansion memory step select the maximum number of banks
If you want the time in C64 OS to sync with the RTC on the IDE64 or CMD-HD, select the IEC RTC driver as the real time clock driver
Using networking
Configure C64 OS networking
C64 OS networking uses C64 Network Protocol (CNP), so you need a CNP server account. Sign into your C64 OS account for details.
For complete information, read the C64 OS Networking Guide.
Once BMC64 shows a connected network:
- In C64 OS, open Settings -> Network. On the Drvr tab, select:
slde.zifor CMD-HD orsld7.zifor IDE64- The driver must support the modem address set
- Set both
Ini.BaudandMax.Baudto38400, save the settings, and run Test. It must report Pass before attempting CNP. - On the WiFi tab, enter non-empty values for the Wi-Fi fields (e.g. test, test) and select Join.
- These fields DO NOT configure the Raspberry Pi's network, BMC64 handles that from its own Network menu.
- On the CNP tab, set the host to
services.c64os.com, the port to6400, enter your C64 OS service credentials, and click Start. - Open the C64 OS Wikipedia application, run a search, and select several content links. The pages should download and display.
- Click Stop when finished.
Security
BMC64 networking is outbound, unencrypted TCP. It does not provide TLS, SSH, VPN, or HTTP client behaviour. DO NOT use it for credentials that must be protected.
That's it! You should be up an running and ready to explore the online world with your C64 😃
Bonus
The networking available in BMC64 also allows you to connect to old school BBS sites. Just use an application like CCGMS Ultimate and connect to your favourite BBS. Again remember to select the modem that matches the address set.
For the ultimate BMC64 experience use my BMC64 PCB for an authentic feel. 😃