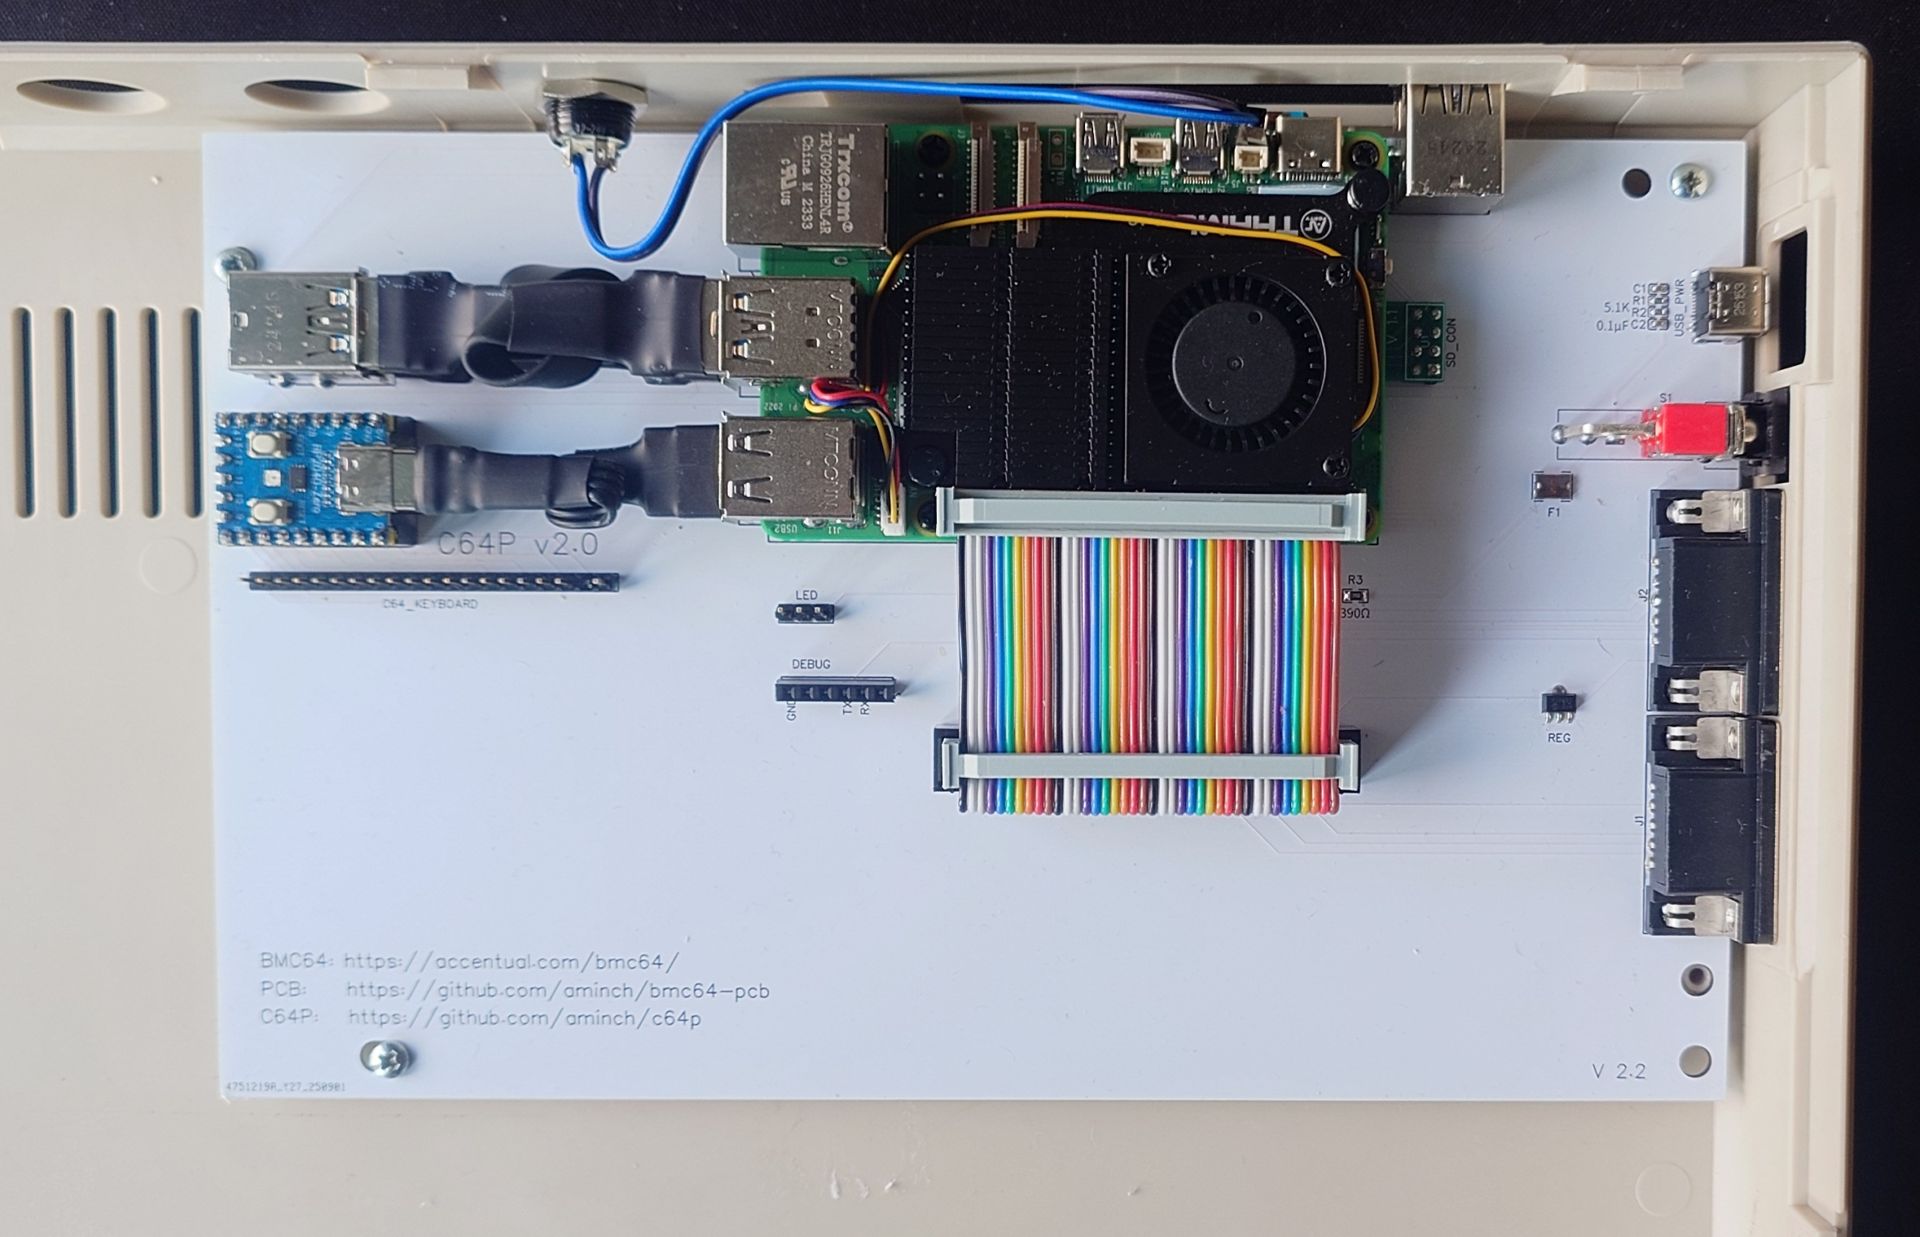
BMC PCB 2.2 with VICE
So this might have started out as the BMC64 PCB, but once I started to hit some of the limitations of BMC64 I wanted to try and make the same PCB compatible with a Pi 5 and VICE running on top of Pi OS Lite... that turned into it's own journey.
The limitations
So if BMC64 is so great why even bother trying to run anything else?
Don't get me wrong BMC64 is great! It boots up in less that 5 seconds, doesn't need any fancy shutdown procedure, and almost everything just works! If this is all you need don't read any further just use a Raspberry Pi 3B+ on this PCB and be happy. 😄
What were the limitations of BMC64:
- It is based on VICE 3.3 (2018), with only minimal features backported.
- It has no networking support.
- Updates are currently community driven and slow, but I did send in some contributions! 😄
- USB support is limited and doesn't support plug and play.
- It's based on Step 40 of Circle (2018), again with minimal features backported.
Updating BMC64
So why not just update BMC64 and fix the problems?
- BMC64 uses an older version of VICE on purpose to get better performance on the Pi 3B+, so it's probably not just a simple update.
- Step 50 (2025) release of Circle include plug and play USB and networking (including WiFi), so this is possible to update, probably but it would be a lot of work.
- Circle itself doesn't support the Pi4/5 the same way as it supports the Pi3 and hence a good part of the video output would have to be rewritten (see issue).
- Some USB devices just don't work on circle (see this comment), one such device is the 8bitdo C64 retro keyboard!!!
All of this would be a significant amount of work to complete to get BMC64 running on a Pi 4 or Pi 5, and even if I did get that to work the 8bitdo C64 keyboard will still not work, so therefore I wanted to try a different path...
The alternative
The alternative is to run VICE on Pi OS or other Linux distro. But I didn't want to run the full desktop version, I still wanted the Pi to boot directly into VICE and start the C64 emulation.
To achieve this I decided to try and use Pi OS Lite, which is a command line only operating system stripped back to the basics, and then compile the latest VICE on it. I would also have to configure VICE so it was compatible with the GPIO set up for the joystick ports and original C64 keyboard connected via the C64P adapter.
Compiling VICE
This was the easy part.
VICE has a svn repository at sourceforge but if you prefer git they have a mirror here. As we are building for a windowless operating system we need to use the SDL version, and VICE has an excellent SDL-Howto.txt that you can follow along and get things working.
Configuring the C64 keyboard
Once you have built VICE for the Raspberry Pi, the next challenge is to get a real C64 keyboard working. As the BMC64 PCB has the C64P keyboard adapter built in this should be a breeze.
- First install the latest firmware release on the RP2040-Zero
- The Vice Layout can be activated by pressing
RUN/STOP + F5when VICE is running. - Check that Pi OS Lite is configured for a English US keyboard. (This is done from the
sudo raspi-configcommand) - In VICE settings set they keyboard to English US and the layout in positional mode.
Once an original C64 keyboard is connected to the C64P it should work correctly!
Configuring the joystick ports
Now to get the original joystick ports on the BMC64 PCB to work. This was a bit tricky.
VICE has the ability to map key presses to joystick directions and buttons via the Keyset settings. After some research I found that the Raspberry Pi also has the ability to simulate key presses via the GPIO pins! So all I had to do was assign the GPIO pins to some key presses then assign those key presses to joystick directions and buttons in VICE and bam! It should work!
To get this to work you need to add something like below to your boot/config.txt file, which configures the gpio-key dtoverlay to assign specific GPIO pins to specific key presses. I just had to match the GPIO pin to the Joystick port pin as it is connected in the BMC64 PC schematic:
    # GPIO Keys setup for connecting real joysticks and using Keysets in Vice

    # Joystick 1
    # Up (Numpad 9)
    dtoverlay=gpio-key,gpio=17,active_low=1,gpio_pull=up,keycode=73
    # Down (Numpad 3)
    dtoverlay=gpio-key,gpio=18,active_low=1,gpio_pull=up,keycode=81
    # Left (Numpad 7)
    dtoverlay=gpio-key,gpio=27,active_low=1,gpio_pull=up,keycode=71
    # Right (Numpad 1)
    dtoverlay=gpio-key,gpio=22,active_low=1,gpio_pull=up,keycode=79
    # Fire (Numpad 0)
    dtoverlay=gpio-key,gpio=23,active_low=1,gpio_pull=up,keycode=82

    # Joystick 2
    # Up (Numpad 8)
    dtoverlay=gpio-key,gpio=5,active_low=1,gpio_pull=up,keycode=72
    # Down (Numpad 2)
    dtoverlay=gpio-key,gpio=6,active_low=1,gpio_pull=up,keycode=80
    # Left (Numpad 4)
    dtoverlay=gpio-key,gpio=12,active_low=1,gpio_pull=up,keycode=75
    # Right (Numpad 6)
    dtoverlay=gpio-key,gpio=13,active_low=1,gpio_pull=up,keycode=77
    # Fire (Numpad 5)
    dtoverlay=gpio-key,gpio=19,active_low=1,gpio_pull=up,keycode=76
Now inside VICE configure the joysticks to use Keyset1 and Keyset2, following the key presses assigned above. If you connect original joysticks to the ports you should now be able to use them in VICE!
Putting it all together
So using a Raspberry Pi 5 instead of a Pi 3B+, and the alternative approach above, I was able to get VICE running using the full functionality of the BMC64 PCB.
This gives you an emulated Commodore 64 which is a bit slower to boot than BMC64, but it can run the latest version, with full networking support, plus plug and play USB, and frequent updates.
If you want to order your own PCB, parts and build your own you can find all the details on the BMC64 PCB repository.
The installation and configuration instructions above do look a bit daunting, and to be honest it took a lot of trial and error to get it all working.
8-bit PC Pi Compiler
Wouldn't it be easier if there was a simpler way to install it all?
Well there is! I put all of this manual compiling, and configuring into a set of makefiles and menu system that will set everything up for you and give you a simple menu to allow you to change the configuration easily.
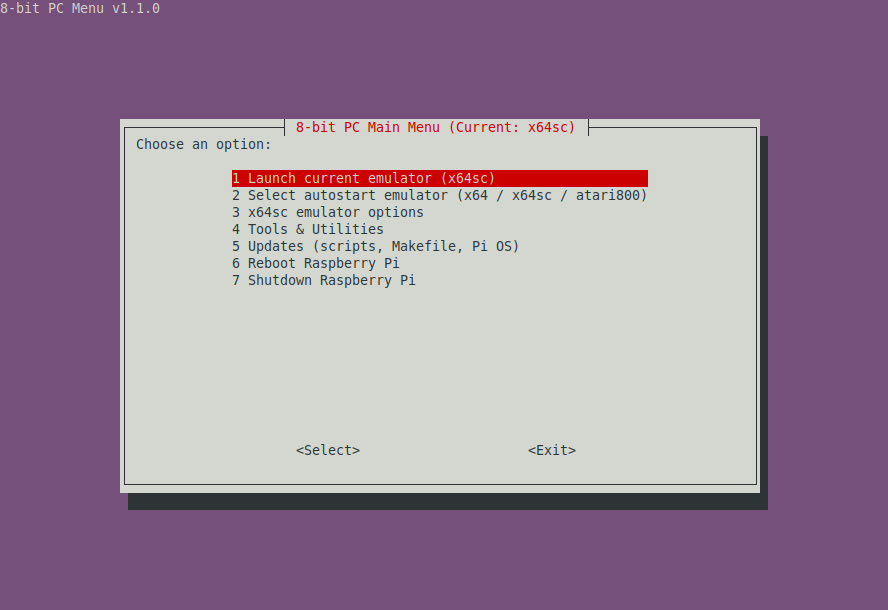
Check out the 8-bit PC Pi Complier repository for details!
Bonus features
The 8-bit PC Pi Compiler will not only work with the BMC64 PCB, but it also works with an off the shelf Raspberry Pi 500 or Pi 500+!!! Nothing to build, just buy one and install!
If you're interested in the Atari800, the the 8-bit PC Pi Compiler can install that classic PC as well! 😃