All-in-one BMC64 PCB
I have been very happy my current BMC64 build which combines the Fascination C64 and my C64P original C64 keyboard to USB keyboard adapter (full details), to make a reasonably clean build. But could it be cleaner?
Goals
Some new updated 2025 goals for a BMC64 build.
The original goals were:
- As authentic as possible
- Original case and keyboard if possible
- Support original joysticks
- Support new joystick adapters (e.g. Nunchuk64)
- Modern video output (i.e. HDMI)
- Simple loading of software from SD card / USB key
- Fast boot times
The additional new goals I set were:
- Single PCB to mount everything on which MUST use the original case mounts. Doing this will:
- Make it super easy to take everything in and out of the case (e.g for testing)
- Reduce cable mess
- Avoid having multiple boards
- Avoid a lot of 3D printed brackets
- Avoid gluing anything in
- Avoid modifying an original case!
- Easy access to required ports on the back (i.e. MicroSD, HDMI, USB)
- Use modern USB-C power delivery
- Use original positions of power switch and power connector
The software: BMC64
This project is only possible with the awesome BMC64 bare metal Commodore 64 emulator created by Randy Rossi.
The solution
EasyEDA Std Edition Online is my current go to pcb designer, it's easy to use, and everything can be stored online. I used the same program in the design of my basic pcb in the Commodore C64P Keyboard Adapter project.
The general idea I had was to lay out the Raspberry Pi with it'a HDMI port pointing out the memory expansion port, the MicroSD card slot pointing out the cassette port, and the power and joystick ports in the standard locations. Then incorporate the C64P design on the same board to internally convert the standard C64 connection to USB. Add an extra external USB port where I could fit it, and done!
Other options
Below is a list of other all-in-one boards which all use direct connection of joysticks and original C64 keyboard to the Raspberry Pi GPIO pins.
- BMC64 PCB - board designed by creator of the BMC64 emulator
- Fascination C64 - Based in Germany makes many C64 accessories, and was the board I used in my original BMC64 project.
- C-PIO 64 - Never tried it and seems very hard to find (old YouTube video)
None allow the connection of wireless adapters or auto-fire joysticks that require power. So my design combines a USB keyboard with only joysticks connected on the GPIO to allow the connection of power. For more details on why read my original post Building a Commodore 64 - Part VIII - (BMC64 Keyboard)
V 1.0
Below is an image of the first design I made and got manufactured through JLCPCB.
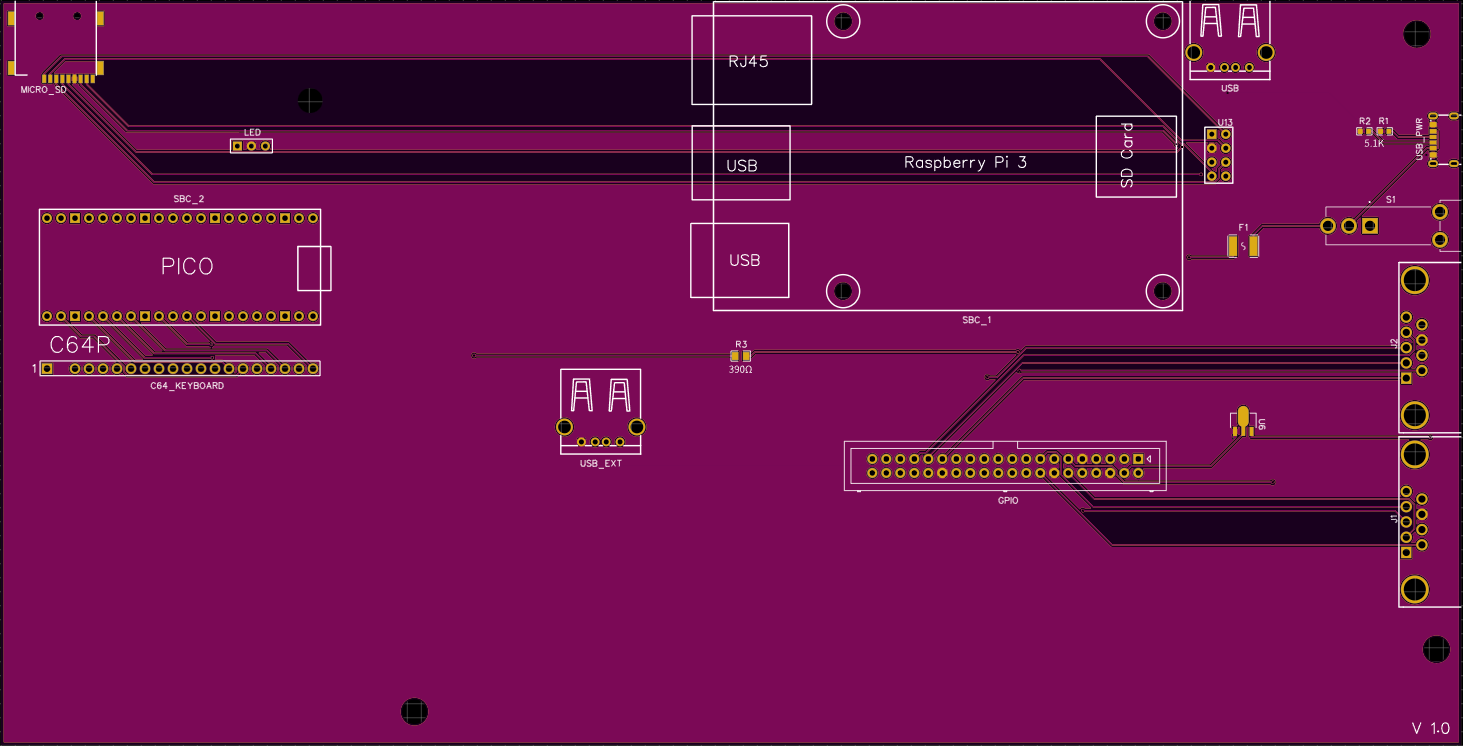
Did it work? Yes and no. Well more yes than no 😃
The problems:
- USB port was too low and you couldn't connect the USB cable. Hack solution was to mount it at an angle. Even then only fits in the C64C case, doesn't work in a Breadbin case.
- Power switch had addition metal rails on the bottom, and I didn't make cut outs in the pcb to accommodate them, so I had to cut and bend them off. 😏
- Rocker on the switch was too big for the hole in the case, so I just removed it for now.
- MicroSD card slot just didn't work at all! Turns out I connected the traces backwards. To hack it I use a bunch of wire between the MicroSD card adapter PCB and the main board to correct my mistake.
After hacking all those fixes it|s alive!
Here's a picture of the prototype v1.0 mounted in a case to show off the clean look:

MicroSD Card Adapter
The MicroSD card adapter is a small additional PCB that is inserted into the MicroSD card slot on the Raspberry Pi and via some header pins connects the Pi's MicroSD card slot to the main PCB and to the MicroSD card slot mounted at the top left of he board. It was a way to cleanly allow access to the MicroSD card from the rear of the C64 case.
Below is a image of how it should be mounted on the header pins.
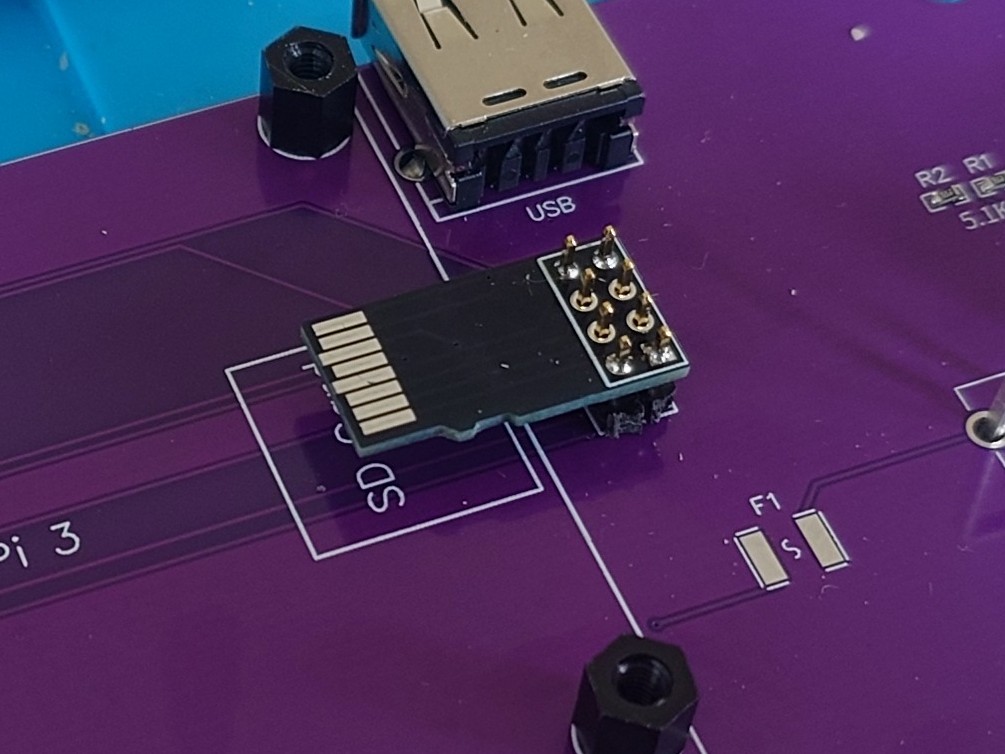
Image of the PCB itself:
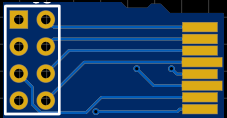
I ordered this PCB with a thickness of 1mm, which is a tight fit in the Raspberry Pi MicroSD card slot. This was a mistake, you should order it with a thickness of 0.6 or 0.8mm which is the correct thickness of a MicroSD card!
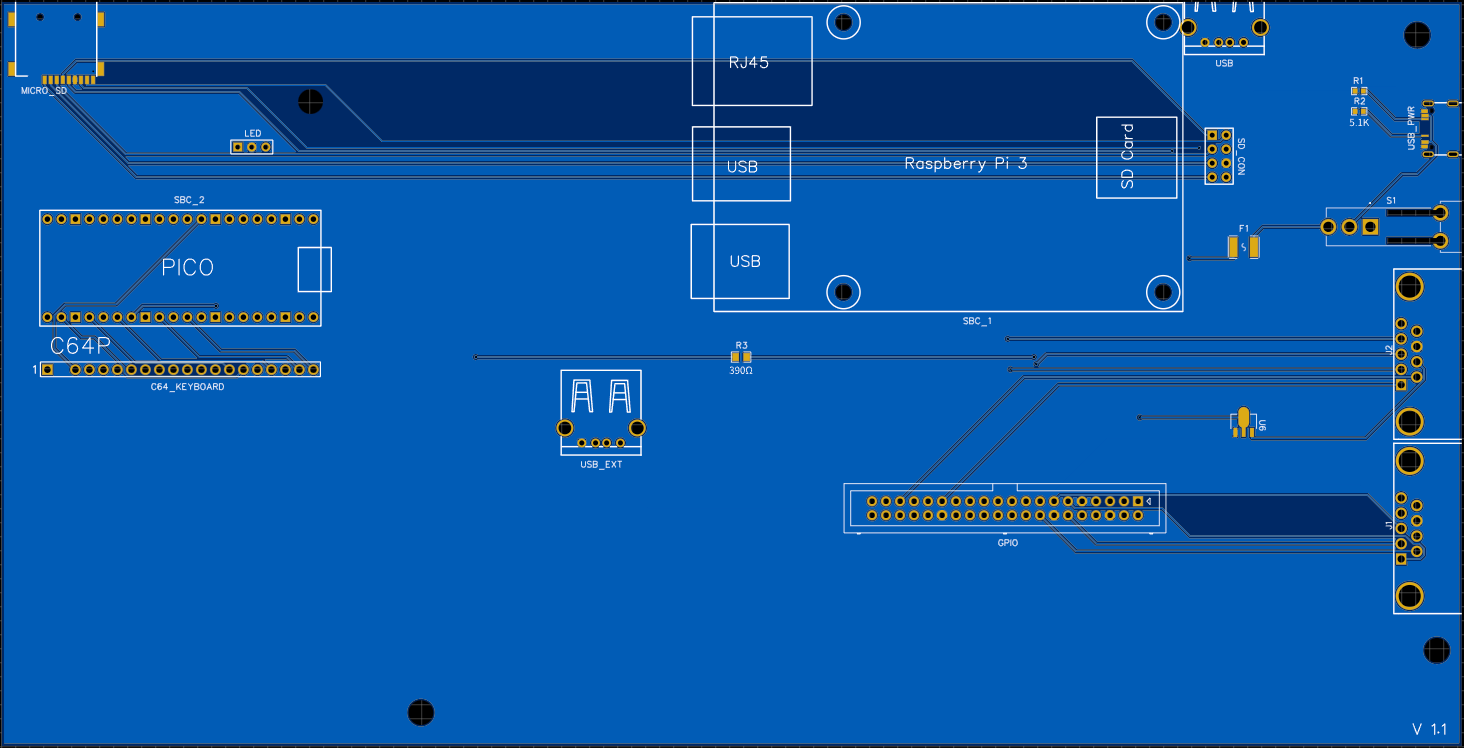
V 1.1
Time to correct the mistakes of v1.0 with a v1.1:
- Remapped the traces for the MicroSD card extension correctly.
- Selected a different USB port which sits much higher off the PCB, should work for both C64C and Breadbin cases.
- Changed to a different power switch which was the same dimensions as the first one that you could order a smaller rocker cap which should fit the case.
- Added some cut out slots in the PCB so the power switch can sit flush.
- Made some minor adjustments to placements of a few items and holes to tighten up the fitment.
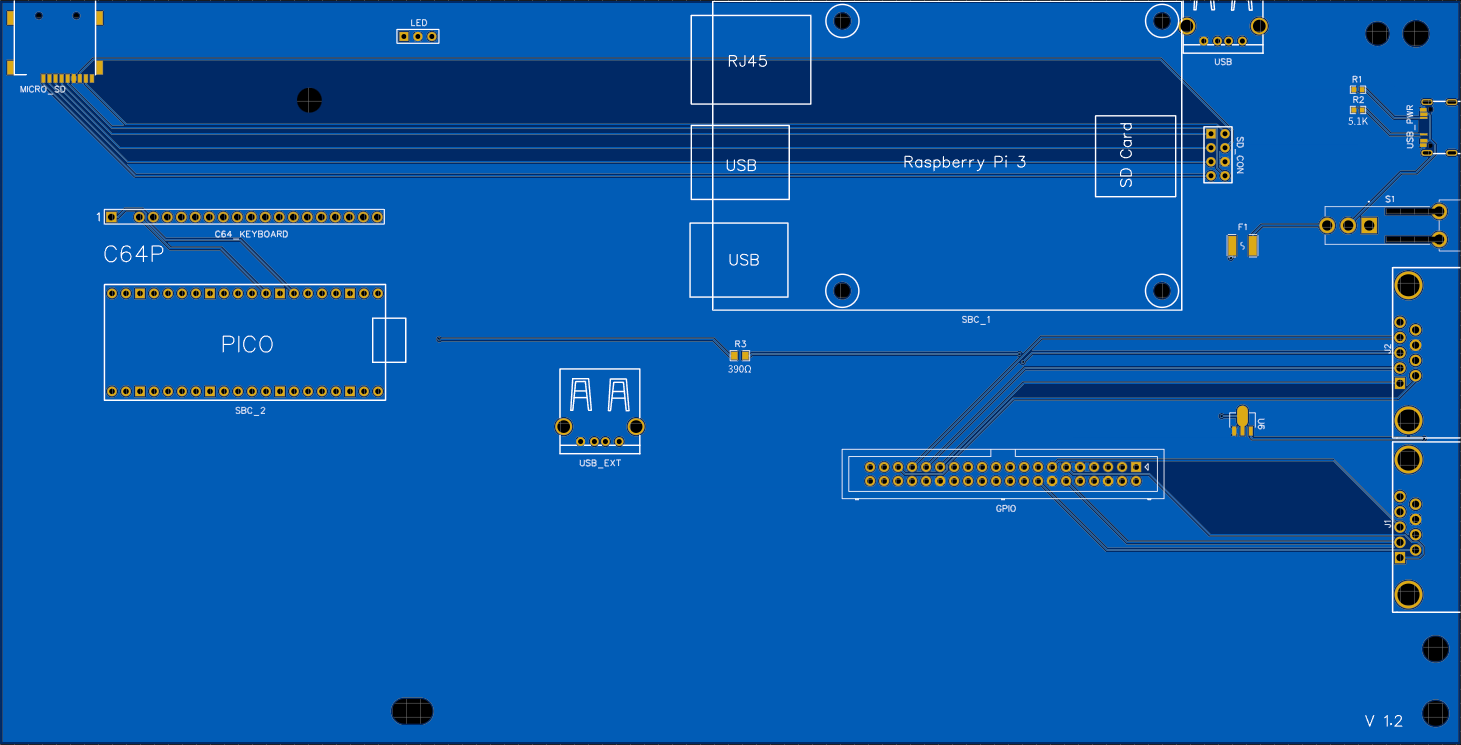
V 1.2
Everything was looking good so I tried a physical fitment in the Retro Fuzion Breadbin Case Set, a recreation of the original Breadbin case. It fitted well but it highlighted that I had forgotten that one of the stand offs was changed in the early Breadbin case design. Also the side plate in a Breadbin case needs an extra mount point.
The v1.2 corrections:
- Added two extra holes in the PCB for attachment differences, and widened one of the holes.
- Swapped the Pico and C64 Keyboard header positions to give more clearance to attach the keyboard in a C64C case.
- Repositioned the LED header.
And here it is:
Components and Parts
I ordered almost all the parts from Digikey, and some from Aliexpress.
Bill of Materials (BOM)
Digikey BOM Online or Excel Sheet Download
Digikey didn't stock any USB cables needed internally to connect the Pico to the Pi, or Pi to the internal USB extension point so they were sourced from Aliexpress.
Ali Express parts
USB Cables
- USB-A (Male) to Micro USB (Male) - (AMST-V8ST) 5cm
- USB-A (Male) to USB-A (Male) - (AMST-AMST) 5cm
Stand offs can be bought at Digikey but are cheaper at Aliexpress
- Nylon M2.5 6+6 - M2.5 size, 6mm height, 6mm thread length. You can buy the screw, stand-off and nut in one package.
Summary
Was this worth it? Yes! If anything I learnt something and it was super fun 😎
For all details on how to build your own check out the git repository with the gerber files, full BOM and instructions on how to put it all together.