C64P - BMC64 Keyboard
I was very happy with the USB keyboard solution I used in the original build, but I wanted to clean up the final result, and I really wanted to use a Raspberry Pi Pico.
Rewind
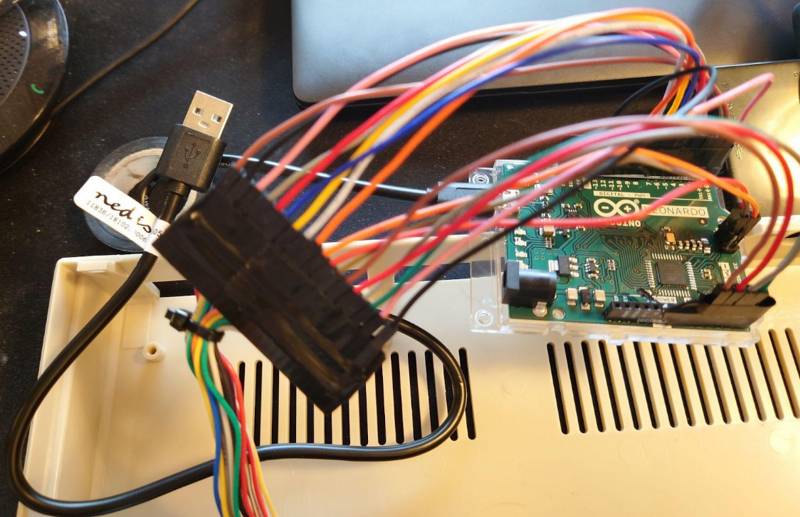
The original solution I chose was the Cheap and Easy Arduino C64 Keyboard to USB Adapter

It was good except:
- The Arduino Leonardo was bigger than I would have liked
- It was messy with all the wires
- Wasn't easy to mount in the C64 case without making some brackets
The new search
Before building from scratch, it makes sense to see what others have done, and I found the three projects below:
- Keymmodore - A USB interface for Commodore Computers Keyboards and Joysticks
- Commodore 64 and VIC-20 keyboard matrix decoder - C project for the Pi Pico
- Retro Pico KMK Keyboards - Uses KMK firmware to connect various retro keyboards including C64
Keymmodore
This project looks great, but there wasn't a build for the Pi Pico. Also at this point I wasn't ready to start with QMK, and figuring out how to port the code to a Pi Pico.
Commodore 64 and VIC-20 keyboard matrix decoder
I discovered the YouTube video of this project, and it looked perfect. I think the only thing that stopped me was having to set up the tool chain and start the building. I probably should have been more motivated but this was before the Pi Foundation released this very easy way to develop for the Pi Pico on Windows: Raspberry Pi Pico Windows Installer
Retro Pico KMK Keyboards
The YouTube algorithm kicked in and then offered me the video of this project. This project was using a Pico as well, but it was using the open source KMK keyboard firmware. KMK is using Circuit Python, which makes building, configuring as easy as editing a text file right on the Pico! So this looked like the dream, Pico based, and simple to configure... or so I thought.
KMK
KMK is awesome as a keyboard firmware. It's super easy to get started. Because it's python you are just editing files directly on the Pico no compiling or messy toolchains. I learnt a lot making a KMK firmware. The good news is that the general principles of KMK and QMK are almost identical so KMK is a great starting point. So what went wrong?
USB Keyboard using KMK Firmware not detected
I just couldn't get BMC64 to recognise the keyboard. My assumption is that BMC64 boots faster than the KMK firmware on the Pi Pico. Since BMC64 cannot recognise USB devices plugged in after boot it never sees the Pi Pico.
QMK
After starting the keyboard firmware journey with KMK, I decided to give QMK a shot since the Keymmodore project used it and all of the sample code I looked at looked so similar to KMK code.
QMK Installation
Usually this is a nightmare on Windows, but since QMK has such a large community it's super easy... just use:
QMK MSYS - A Windows one-click installer for the QMK CLI
The firmware
So I wrote the firmware myself from scratch...
Only two files need to be set up for a basic keyboard.
- info.json - holds the overall configuration of the firmware
- This is new for QMK and the new way they suggest firmware is written instead of in multiple h and c files. The configuration will contain the GPIO pin connections, mapping of physical layout of the keyboard to it's matrix, and set up features via flags.
- keymap.c - specific key mapping
- Has the specific key mapping for the keyboard, plus any special handling you want.
You can find the complete firmware here: Commodore 64 Pico (C64P)
Features
A short list of the features and choices I made in building the firmware:
- Supports two modes:
- PC mode to connect to a regular PC, keys work as shown plus function keys
- BMC64 mode, specifically for BMC64 in positional mode, plug and play
- The mode is retained even after the keyboard is disconnected
- Ghosting is not a problem... thanks to QMK's built in handling
- Layout in the keymap.c follows the physical layout of the keyboard.
- The other projects above use the direct layout of the keyboard matrix but I found it was much easier when remapping and making changes to follow the physical layout, and it's easy to set up in the info.json file.
- Instant boot, so works seamlessly with BMC64!
Firmware Installation
Installation is super easy. Just boot the Pi Pico while holding down the BOOTSEL key, and it will mount as a USB drive on your PC. The drag and drop the uf2 file onto the drive... done!
Check out the releases section for the latest build.
The clean up
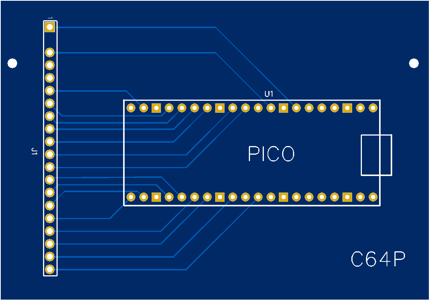
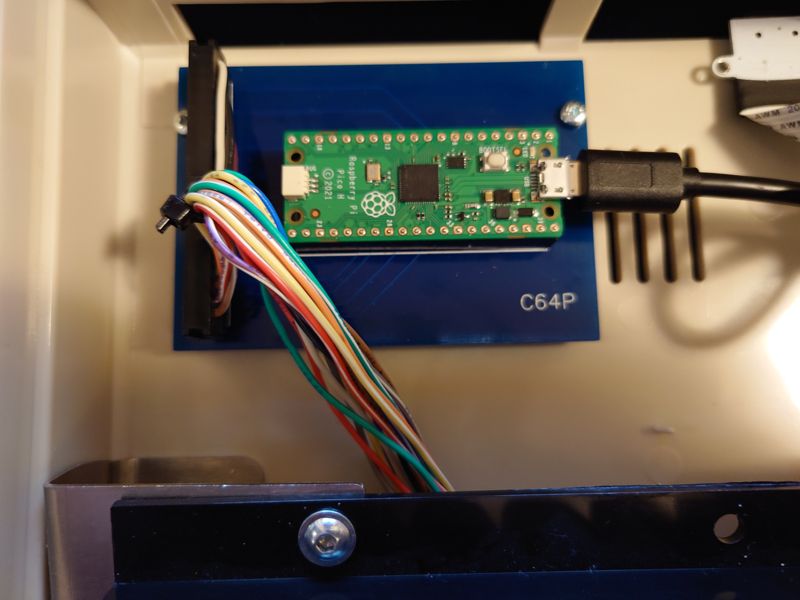
To make the build super clean I created a couple of PCBs that have a header for the C64 keyboard, and space to mount the Pi Pico. The larger one is designed to screw directly to the existing PCB mounts inside a C64C case. These are available in the repository if you want to order your own.

The final result
Super clean, easy to update, and works great!
